photo Slider1verb_zpsu4ingudm.png
 photo SocialCredit_zpstliy96k9.png photo SocialFB_zpssngsezyx.png photo SocialTwit_zpslfcqrgoc.png photo SocialIG_zpsf7okcyv2.png photo SocialPin_zps1w2rkf2m.png photo SocialCon_zpszaqvtizh.png

Zombies

 
My nephew recently had a zombie birthday party.  It was a perfect kick off to the Halloween season.  Albeit a little morbid, these cookies were fun to make. 


I re-created a zombie from a clip art image that I liked.  I used a flip-flop cutter for the zombie faces.


The brain cookies were made with a pumpkin cutter.  I just cut off the stem. 


The zombie silhouettes were made to match the party invites. I then splattered red food coloring on them with a paint brush.


 Happy Birthday Aidan!

A Day in the Life of a Cookie

I've had a lot of people inquire about getting custom cookies really quick and/or getting custom cookies really cheap. This intent of this post is to give you a glimpse of what a cookie goes through (or what I go through) to get ready for your special event or celebration.  

Pardon the pics as they were all taken with my trusty iphone while in the process.  I used an array of recent designs to demonstrate all of the steps. :)


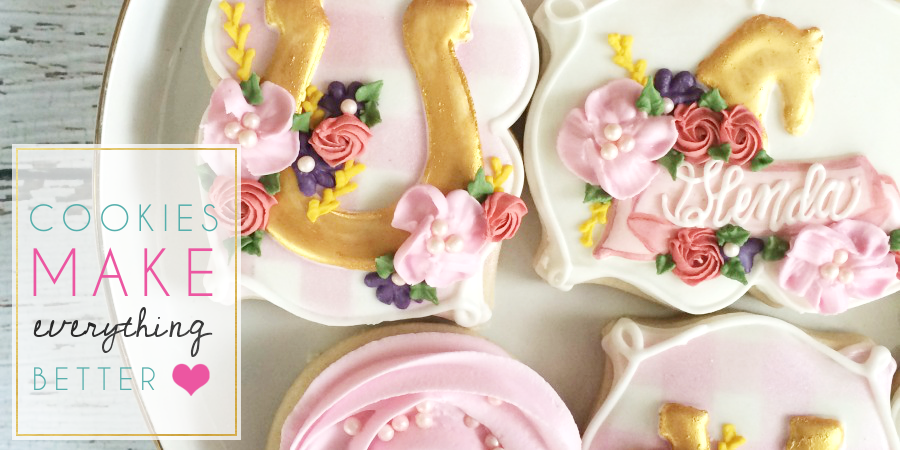
It all starts with an idea or inspiration.  I was lucky enough to collaborate with a clever Mom and Grandma for a little girl's first birthday for the bubble cookies.  I told them that I would sketch something out for them to see and this is what I came up with. 

A lot of research goes into the design.  Some of the time I don't have a clue about the specific character that I am asked to make.  For example, I was asked to make Abby Cadabby cookies a while back and I said, "sure!" I then went straight to the computer to see who the heck Abby Cadabby was.  I have two boys who have never been into Sesame Street. :)

Needless to say, careful thought and planning go into each order.

 
Welcome to my Sunday, otherwise known as dough-day  I'm not going to lie, this part is NOT my favorite.  It could take a few hours to make all of the dough I need for a week.

 
The dough is divided up and chilled.


The dough needs to be chilled enough to be cut but soft enough to be rolled out.  Got it? :)
The bands on the side of my rolling pin help ensure that the dough is rolled out at an even thickness.  The ones pictured are called Evendough Bands and I picked them up at Sur La Table.  I don't remember what I did before I got these but I do remember that life was so much easier when I did.

 
After the cookies are cut, they go back into the fridge.  I like them to get nice and cold so that they maintain their shape while baking.  Then, it's off to the ovens! 

 
While the cookies are baking, I am making icing.  And then more icing.

 
I wish I had a pic of how the icing gets bagged.  This many colors can take some sweet time.  I usually have two bags per color; one for flooding and one for piping.  {I never say any curse words when I have to make cookies with 10 different colors}. ha! ;)

 
Now for the part that I LOVE!  Seriously, I love decorating these little guys.  For these particular chevron cookies, I took some direction from Callye of Sweet Sugarbelle.  I made a chevron template out of cardstock and poked tiny holes in the cookie with a toothpick to make the pattern. Then I did a dot-to-dot with my piping icing.  {I am only a little anal.} 


This is where the cookies get "flooded." A thinner icing is used here to flood the cookie.  I wanted the apples to be two different colors so I waited until the white was dry before adding the second color.  I occasionally have to wait until the next day before I can add the second color.


Decorated cookies are all about the details!  For the bubble cookies, (after all icing was dry) I added a layer of disco dust (non-toxic shimmer used for decorating sweets).  A thin layer of vanilla is applied to the area that I want to shimmer and then the disco dust is sprinkled on.   Marian from Sweetopia does a better job of explaining how this is applied.
 
 
Another cool detail is to add some luster dust (a shimmery powder when mixed with vanilla, tuns into an edible paint).  This is literally painted on each cookie.  For the cookies above, most of the details were actually hand painted including the icing.  The technique is called brush embroidery.  I learned from the master, Amber of SweetAmbs.  She has great online tutorials.


After the details are added and the cookies are completely dry, they are ready for packaging which is also very time consuming (especially if they have to be shipped). 
 
 
 As you can see, there are so many steps that go into making these custom treats. I didn't even discuss the time that goes into answering emails, taking orders, photographing cookies or updating facebook and the blog with pics. I personally make the cookies over the span of a week or less, doing a little every day.  Since I work full-time (in child welfare), all of this work is done at night after my kiddos go to bed.
 
There are a lot of cookiers out there who put their heart and soul into making these perfect pieces of edible art made to order. I have so much respect for all of them and their hard earned $2 to $4 (average) per cookie. 

So tell your local cookier how much you love them. :)


Giveaway from Pretzels Pleaze

  Another awesome giveaway today!!!  This awesome treat is from my friends, Amanda and George of Pretzels Pleasze.  They are also here in Houston and have amazing products. 
 
They are giving away one dozen of their brand new Halloween chocolate covered oreos!  How stinking cute are these?!
 
 
Enter to win these spooky treats below. 


a Rafflecopter giveaway

Thank you Pretzels Pleaze for all of your support!!!

Remember to VOTE, share, email and tweet today to move Whip It Good Cookies to the top in the Martha Stewart American Made contest! Thank you everyone!


Oh Sew Peachy

Oh sew peachy is how I'm feeling!!  I have had overwhelming support so far in the Martha Stewart American Made contest.  You have all pulled through in a HUGE way!!  In order to keep moving up in the polls, Whip It Good Cookies needs YOUR vote!  Please take a minute to vote here
 
After you vote, come back and tell me what number vote you were for a chance to win your choice of one of these custom hats from my friend Kari of Oh Sew Peachy
 
 
Kari is an awesome Mom to two boys and small business owner right here in Houston as well.  For the guys, vote to win one of these and give it to your favorite gal. ;)
 
You can earn and extra entry for "liking" Whip It Good Cookies on Facebook and for tweeting about the contest. 

VOTE, share, email and tweet today to move Whip It Good Cookies to the top!  Thank you cookie lovers!  XOXO


a Rafflecopter giveaway  


It Feels Good to Share


Have you shared the Martha Stewart contest link today?  I sure would love for you to encourage your friends/family to vote. :)  If you do, I will share too; one dozen cookies!!! 
 
Share the contest link via facebook, email or twitter and let me know you did below.  One lucky winner will receive one dozen cookies of their choice (date subject to availability).

***If sharing on fb or twitter, please tag me in the post (include my name or Whip It Good Cookies).  If you if you are emailing the link (or already have) please copy/forward the email to whipitgoodcookies@hotmail.com
 
a Rafflecopter giveaway

Thank you so much for sharing!!!

Lovebirds

I really loved making these cookies.  Aside from the fact that I got to make more chevron cookies, I loved the theme and the design that I got the inspiration from. 


There were several different patterns that I decided to go with for these.  


The lovebirds are Erin & David.


And here are the cookie-loves of my life. :)

 
These cookies were made to match the invite designed by Amy of Inviting Moments.  She has some awesome stationary in her shop!

 
The super cute Jessica who ordered these cookies sent me a picture of the cookies on the party table and let me know how much everyone enjoyed them.  How sweet is she?!
 

Photo taken by Jose Garza


2nd Birthday | Cookieversary

September marks the 2nd year of my sweet adventure.  Is it a birthday or anniversary?  I like cookieversary. :)


I made my first cookie in September of 2010.  When I was still on maternity leave with my youngest monkey, I started stalking discovered party blogs.  I remember seeing a picture of a decorated cookie and thinking to myself, "I would LOVE to try that."  I found inspiration from Bridget from Bake at 350 and Callye from The Sweet Adventures of Sugarbelle.  I studied their blogs and bought some supplies to try it myself. 


After I made these, I was hooked and so proud!! (Circles can be really hard to pipe by the way!)

Like so many other mom's that I know, I always thought it would be nice to have a plan B; something that I could work towards so that I could spend more time with my kiddos.  Fast forward 2 years and I am a finalist in a Martha Stewart contest.  I have learned SO much and come SO far in a short while. 

This month, I am going to highlight the awesome people that have made all of this possible for me.  I hope you will stay tuned for the month-long celebration!

Cookie Feature | The Party Dress Magazine

  I was asked by the creative gals of Anders Ruff to make some cookies for their Glam-o-ween feature in The Party Dress Magazine!


The photos were taken by Rebecca of Rebecca Bond Photography


I am still in love with these cookies!  I am honored to have been a part of another ridiculously cute party from Anders Ruff and to be a part of Kelly's beautiful magazine.
 
You can view the magazine online here, download it to your ipad or purchase a hard copy like I did. :)  There are so many creative ideas for the fall in this issue. 
 
The printables to have your own Glam-o-ween party can be found here.

American Made Finalist


That's right!!!!  I can't still can't believe it either! 
 
One of my awesome co-workers suggested that I enter this contest (Thank you Emma).  So, I did.  I am now a finalist out of a few thousand nominees!! 
 
I am so proud and honored (and a little emotional) to be mentioned on the same site as Martha Stewart.  The positive response has been amazingly overwhelming.
 
The ultimate winner will be determined with the help of your votes.  You can vote once per day until September 24th.  I can't express how much I would appreciate your votes!  You can click here to vote for me.
 
Thank you all for your continued support!  I can't keep doing what I do without you!
 
XOXO,

My Chevron Addiction

 
Hello, my name is Erin and I am a chevron addict.  Seriously!  It is my favorite print right now and I can't seem to shake it.  Don't be surprised if you ask for a specific themed cookie and I just happen to throw a couple of chevron cookies in there to match. ;) 
 
I am out of control.


I will post more about some of these cookies in a bit.

I Bake Them; You Decorate Them

I can't take credit for this idea.  It was the brainchild of one of my favorite friends, Tracy of Spry Art Photography.  She asked me for some blank canvases so that the kids could decorate them.  I love doing this! I have made these for her three times now for her kiddos' birthday parties. 
 
 
I include unused paint brushes, icing, and sprinkles.


One of her daughters recently had a doggie themed birthday party so a platter of dog cookies was a must.


This time, I included a platter of cookies they could eat while they decorated.